Service Bus is the infrastructure provided by Windows Azure for implementing messaging patterns. Click here for further information about messaging management on Windows Azure.
I’m currently thinking about a “notification server” using the cloud and Service Bus seems to fit my requirements. This article describes “Queues, Topics and Subscriptions” concepts:
These “brokered” messaging capabilities can be thought of as asynchronous, or decoupled messaging features that support publish-subscribe, temporal decoupling, and load balancing scenarios using the Service Bus messaging fabric. Decoupled communication has many advantages; for example, clients and servers can connect as needed and perform their operations in an asynchronous fashion.
Yes, it’s what I need.. let’s start to develop a test project, in order to understand also the development time (I’m a dba, but please appreciate my efforts 🙂 )
Intro
What I need to do? I want a Visual Studio 2012 solution with at least three project, one for sending a message to the service bus, one for reading and dispatching messages and a simple model class to work with. The purpose of this post is to use the default cloud project template provided by Visual Studio 2012 and to change it a little bit. The default template considers Service Bus Queue, but I need a Topic based one (we will discuss about that later in the post). However, we need to gather some prerequisites.
Step 1 – Gathering prerequisites.
When you create a new project in Visual Studio 2012 choosing Your_Language > Cloud, you’re not able to create the cloud solution. Double click the “SDK download” link and wait for web platform setup (near 40MB). After that, you will be able to add a new cloud project. Visual Studio 2012 (I saw also Visual Studio 2010 SP1) is mandatory.
Step 2 – New project with Visual Studio 2012.
When you choose a new cloud project, a new solution is created (I’ve called it MessagingTest) with a MessagingTest cloud project inside. A popup will ask what “role” you want to add. We need a Worker Role, that is a “back-end process” (instead of Web Role, that is similar to a front-end application). Let’s add “WorkerRole with service bus queue” (this is intended for a simple queue, but we can manage the type of messaging pattern to apply after):
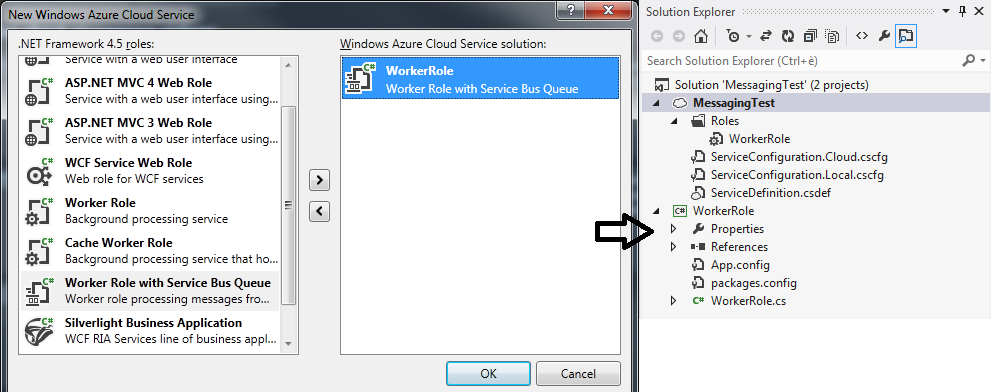
The project template adds a reference to Microsoft.ServiceBus.dll and the following namespaces to the WorkerRole project:
using Microsoft.ServiceBus;
using Microsoft.ServiceBus.Messaging;
We can notice also two config files with .cscfg extension and a definition file with .csdef extension (Windows Azure service configuration system) on the cloud project. We need that files in order to configure the connection string to our service bus namespace. Long story short, we will create a queue in the cloud and we need a connection string in order to contact the endpoint in which this queue is placed. You can create a service bus namespace and retrieve it (with the key) using the Windows Azure Portal.
Step 3 – First configurations.
We need to change the ServiceConfiguration.Local.cscfg file on cloud project, changing connection string section. Suppose to have a namespace called <yournamespace> and a <key>, the connection string will be:
Endpoint=sb://<yournamespace>.servicebus.windows.net/;SharedSecretIssuer=owner;SharedSecretValue=<key>You can find your <key> following these steps.
Step 4 – Message model
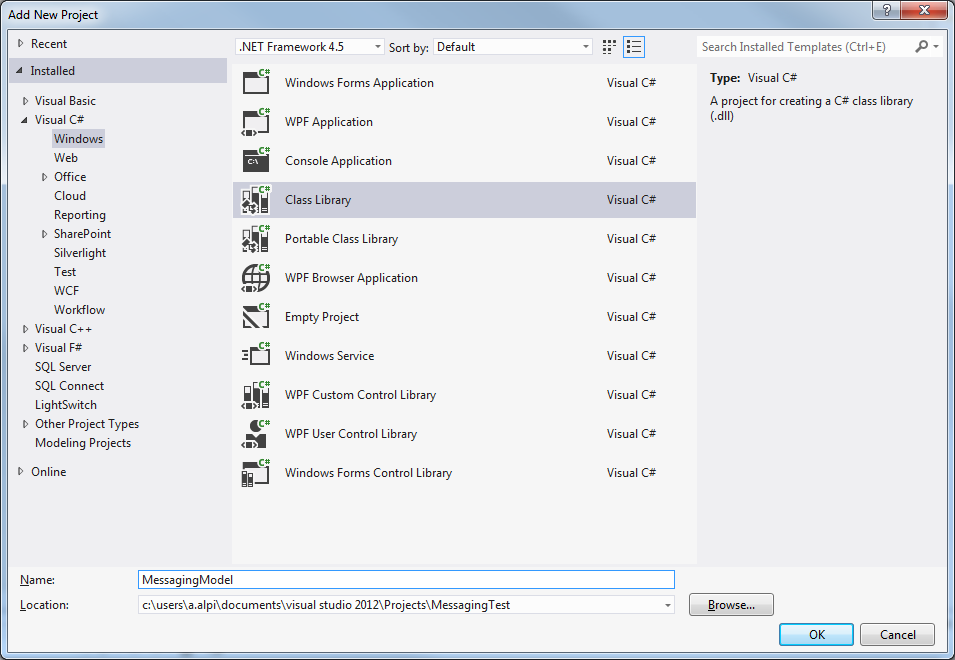
After the configurations setting, let’s create a new Class library (MessagingModel) that will contain the model (that is the “message type” we want to send/receive/manage) on the same solution:
The model could be this one:
public class NotificationModel
{
 public int NotificationId { get; set; }
 public DateTime NotificationDate { get; set; }
 public string NotificationDescription { get; set; }
}
After the model definition, we need to reference it on the WorkerRole project.
Step 5 – Prepare the Worker role to receive
The WorkerRole project is already “complete”. There are the OnStart(), OnStop() and Run() methods. The queue definition and creation, the load of the configuration, the receive section, very simple. Yes, it’s true, but keep in mind that this is a very simple project to start with. For instance, you can configure the mode of the queue (PeekLock, the default non-destructive read and ReceiveAndDelete), add a cache if you need to create the “same” message, add a log, change the type of messaging infrastructure, and so on.
We will see how to switch a Service Bus queue worker role to a Topic oriented one, that uses the publish/subscribers pattern.
From Windows Azure documentation

As you can see, the topic has usually more than one subscription and allows a one-to-many relationship with consumers (in queues, each message is processed by a single consumer).
How to change the header of the role?
We need a Topic name, a subscription name (only one in this sample) and the client that will manage messages:
public class WorkerRole : RoleEntryPoint
{
 const string TopicName = "MyFirstTopic"; // Topic name
 const string SubscriptionName = "MySubscription"; // Subscription name
 // client for managing messages
 SubscriptionClient Client;
 // stop flag
 bool IsStopped;
[...]
We will use the SubscriptionName and TopicName also in the sender project.
How to change the OnStart() method?
On this method we will create the subscription, using the connection string from settings:
public override bool OnStart()
{
 // Set the maximum number of concurrent connections
 ServicePointManager.DefaultConnectionLimit = 12;
 // Get configs from config file
 string connectionString = CloudConfigurationManager.GetSetting("Microsoft.ServiceBus.ConnectionString");
 // Inserts a new topic if not exists
 var namespaceManager = NamespaceManager.CreateFromConnectionString(connectionString);
 if (!namespaceManager.TopicExists(TopicName))
 {
   namespaceManager.CreateTopic(TopicName);
 }
 // Creates the subscription if not exists
 if (!namespaceManager.SubscriptionExists(TopicName, SubscriptionName))
 {
   namespaceManager.CreateSubscription(TopicName, SubscriptionName);
 }

 // Creates the subscription client
 Client = SubscriptionClient.CreateFromConnectionString(connectionString, TopicName, SubscriptionName);
 IsStopped = false;
 return base.OnStart();
}
The CreateSubscription method, used with the first two parameters, creates a subscription without any filter. You can specify a third argument, that is the filter to apply. You can use, for instance, the SQLFilter.
es.
// The MessageType property must be set on the message when sending
namespaceManager.CreateSubscription(TopicName, SubscriptionName, new SqlFilter("MessageType = 'NOTIFICATION'"));
The filter must be set just before sending the message, adding a dynamic property (we will see how to).
How to change OnStop() method.
This method frees resources and close the service bus communication. Can be left as is.
How to read from queue on the Run() method.
We use the default mode (PeekLock, non-destructive reads) but you can change the mode using the CreateFromConnectionString overloads on the OnStart() method. This method loops (with an infinite loop) and waits for new messages:
while (!IsStopped)
{
  try
  {
    // Receive the message
    BrokeredMessage receivedMessage = Client.Receive();
    if (receivedMessage != null)
    {
      // Process the message
      // Do something..
      receivedMessage.Complete();
    }
 }
[...]
The rest of the method is the catch section, in which every exception is trapped. Now, we need to “Do something..” with our message. Let’s trace the result, casting it into our model. We need to refactor a little bit:
if (receivedMessage != null)
{
  // Process the message (cast into our model)
  NotificationModel model = receivedMessage.GetBody<NotificationModel>();
  // Here's the message
  // Here's the message
  Trace.WriteLine(String.Format("Message id --> {0}", model.NotificationId.ToString()), "Body structure");
  Trace.WriteLine(String.Format("Message description --> {0}", model.NotificationDescription), "Body structure");
  Trace.WriteLine(String.Format("Message date --> {0}", model.NotificationDate.ToShortDateString()), "Body structure");
  receivedMessage.Complete();
}
As you can see the GetBody<T>() method simplifies our work with casting the result into our T = NotificationModel.
Step 6 – Send a NotificationModel message
Ok, we are ready to send a message. We can use a web page, a console app, a WPF client, and so on. I use a simple console application. First of all we need to add the references to Microsoft.ServiceBus.dll and Microsoft.WindowsAzure.Configuration.dll. Then we’ve to add also the reference to the NotificationModel model. Finally, we have to add the following configuration on app.config of our console application:
<appSettings>
 <add key="Microsoft.ServiceBus.ConnectionString" value="Endpoint=sb://<yournamespace>.servicebus.windows.net/;SharedSecretIssuer=owner;SharedSecretValue=<key>" />
</appSettings>
And now, the Main() method implementation:
 NotificationModel model = new NotificationModel();

 // prepare the message
 model.NotificationDate = DateTime.Now;
 model.NotificationDescription = "This is my first message";
 model.NotificationId = 1;
 // get the connection string from config (app.config in this sample)
 string connectionString = CloudConfigurationManager.GetSetting("Microsoft.ServiceBus.ConnectionString");

 TopicClient Client = TopicClient.CreateFromConnectionString(connectionString, TopicName);

 // Create message, passing our model
 BrokeredMessage message = new BrokeredMessage(model);

 // Send message to the topic
 Client.Send(message);
If you want to create the property for filtering (a subscription can be created with filter, as described above) you can specify it using the following syntax, when creating message :
 // Message type for filtering on subscription (optional)
 message.Properties["MessageType"] = "NOTIFICATION";
Step 7 – Test it!
The solution will appear as in the following picture:
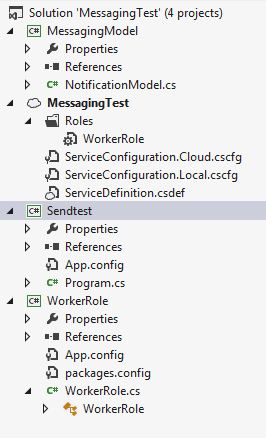
- A cloud project called MessagingTest, in which there is the related Worker Role
- A project called WorkerRole that is the manager of the Topic (start/stop and run for receiving the messages)
- A library project called MessagingModel in which we’ve created the model for messages
- A console application project called SendTest for sending messages to the Topic
Start the Worker Role (executing the cloud project) in order to create the Topic and the related subscription. The infinite loop begins.
How can we monitor the worker?
When executing locally the project you will notice an icon on the systray, the Windows Azure Compute and Storage emulators icon. Right click on the icon and choose Show Compute Emulator UI. This window will open:
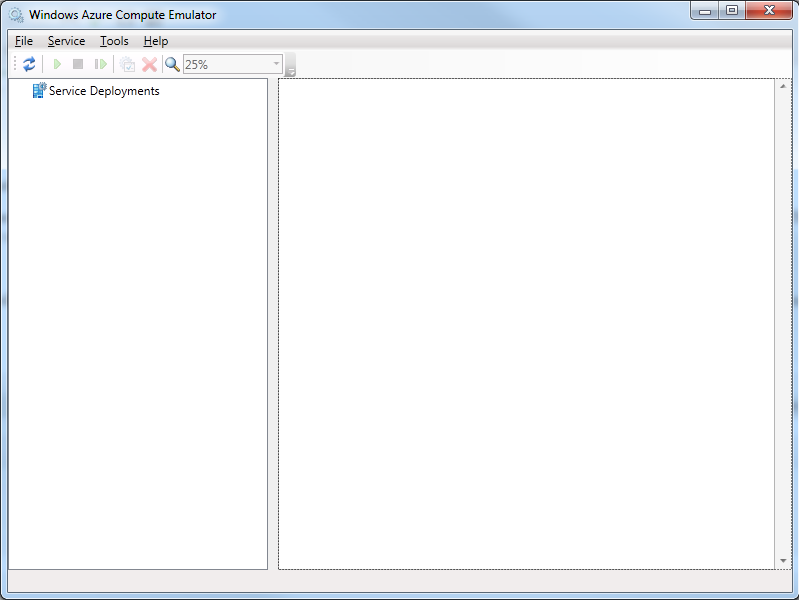
If the worker role is started, you will find a tree like this:
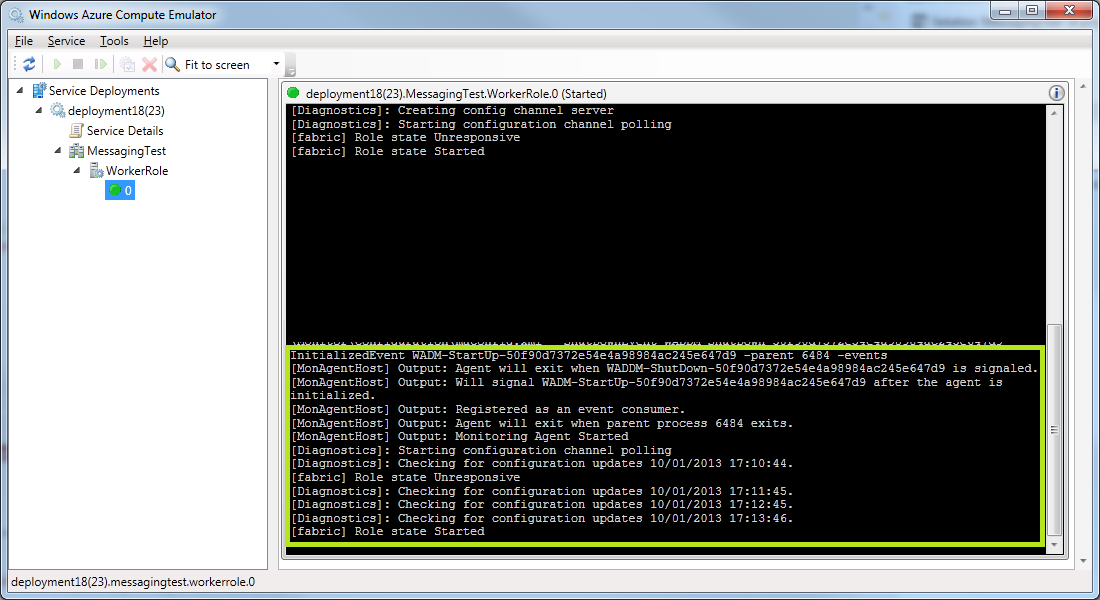
As you can see this is the monitor of the worker role. It tries to receive messages from the Topic.
Now, we can try to send the message. Execute the SendTest.exe console. The message will be sent to the “MyFirstTopic” Topic, with a “MyFirstSubscription” subscription. The message will optionally have a MessageType property as filter. This will be the trace on the monitor:
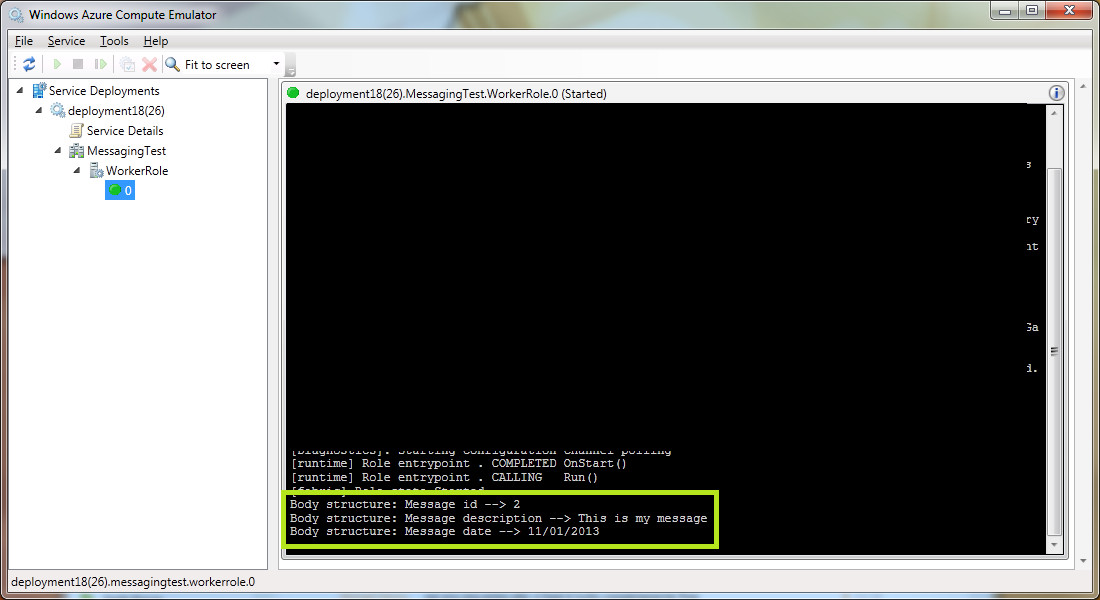
Brilliant! It works! The emulator simulates the cloud service bus, but the behavior will be the same in the real cloud environment. You have a monitor directly into the Windows Azure Portal:

If you want to start using this kind of approach I suggest to follow these links:
Stay Tuned! 🙂


Fantastic post. It has a lot details and it’s simple!!!1